TL;DR
- Modern Terminal with nice (Nerd) Fonts
- ZSH
- oh-my-zsh
- Modern Prompt with starship
- Modern CLI tools (fzf, ripgrep, bat, tmux, jq)
- Fast editor (Emacs, Neovim, Helix)
- Organize your dotfiles with GNU Stow
The Unix shell/Command-Line Interface (CLI) is an ancient tool. Despite being around forever, the shell is highly customizable and with a good configuration, it is on par with modern graphical IDEs. Because it is configurable, you can make it truly your own, thereby surpassing out-of-the-box experience of IDEs. The shell has existed for 50+ years, and since it’s highly adaptable, it’s not going anywhere which makes it a great knowledge investment for the future. No need to re-learn your toolset every few years. However, it comes with a catch, a full shell configuration takes time and effort. In this article, I want to show you how I configured my shell for ultimate productivity, so you don’t have to go same tiresome learning process as I did.
Use a modern Terminal
A good terminal application is the main entrance to your shell environment and crucial a top-notch developer experience. Recommended terminals are:
- Gnome Terminal
- KDE Konsole
- Alacritty (minimal, blazing fast, written in Rust)
- iTerm2 (MacOS)
For a modern look-and-feel, I suggest Nerd Fonts. It comes with icons for Kubernetes, Python, Java, Golang, Rust which pretty up the CLI. For Ubuntu, you can install and enable Nerd Fonts with the following commands:
| |
| |
Switch to ZSH
Most Linux distribution use bash as the default shell. We want to switch to zsh which is more powerful than bash, but yet fully compatible to it. Newer MacOS versions come with zsh enabled. For Ubuntu you have to install zsh:
| |
oh-my-zsh
With zsh installed, we paved the way for our customization endeavours. We are ready to install oh-my-zsh, a delightful, extensible, pre-configured zsh environment with reasonable defaults. It builds the base for further tailoring and provides a cheerful prompt with a lovely color theme. oh-my-zsh also defines a lot of useful aliases for git and other CLI tools which save
The main zsh configuration file is ~/.zshrc. There you can enable and disable
oh-my-zsh plugins but also write your own aliases or activate subcommand
completions for kubectl, git or terraform. You can go even further and
write your own bash functions which are then available in you shell sessions.
For example, I use functions to toggle between different java versions
toggle_java8 and toggle_java17. Below you find a small section of my
~/.zshrc:
| |
starship
In the next step we configure our shell prompt. The default prompt only shows you the current working directory. As a cloud infrastructure engineer though, I work with Git, multiple K8s clusters, Azure Accounts and other different contexts. For that reason, I like to have all such information in my shell prompt. That proactively prevents executing commands in the wrong environment 😱.
The best prompt these days is starship. It’s stable,
fast and easily configurable via a single starhship.toml file.
| |
| |
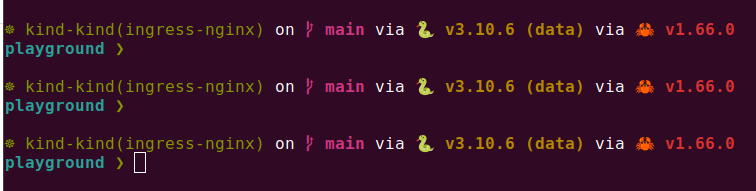
My current prompt shows the current K8s cluster and namespace, the current git branch, the current active Python and the Rust versions with icons:
Modern CLI commands
We already made it very far and your terminal experience should have improved a
lot by now. To get most out of the shell, you should master the pre-installed
tools like find, grep, sed, ls, cd, cat, less etc. Additionally to
the classic tools, modern alternatives exist which provides a contemporary user
experience. Below you can find my favorite tools which have the biggest impact
on my daily workflow:
fzf, an interactive shell command history search tool on steroids, it completely changed the way how I use the shell command history with
CTRL-rdelta, a much nicer git diff, delta not only highlights which lines changed but also the exact location in a specific line
ripgrep or ag, both are
grepalternatives, they are faster and provide a more convenient API, e.g they ignore common folders by default like.gitornode_modulesbat, a
catalternative with syntax highlighting and pager featureszoxide, a smarter way to change directories, zoxide remembers nested paths and makes switching directories a breeze
tmux or zellij are terminal multiplexers. If you run long running terminal sessions or you work on remote machines, these tools are highly recommended
kubectx/kubens,
kubectlcommands can get very long, with kubectx/kubens you can pin the cluster and namespace for all future commands which saves a lot of typing
jq / yq
As a developer, you often consume JSON Rest-APIs. Writing a test for
experimenting in your programming language can be cumbersome. A faster way is
using curl and jq:
| |
yq is the same as jq but for yaml files. A
great facilitation if you work often with Kubernetes.
Shell command tips and tricks
The shell is a whole universe and it takes time to get familiar with it. Eventually, it is a rewarding experience which will be beneficial for the rest of your life. Unfortunately, there is no shortcut for learning the CLI. Anyway, I want to show you my most useful commands in order to give you an head start:
| |
Your Editor, choose wisely
Fist of all, I don’t want to trigger another editor war. Everyone can use the editor she prefers and makes her most productive.
Nevertheless, one’s editor is the main workhorse for developers who spend many hours per day in it. Thus a good editor is essential. For me a good editor must be able to run inside the shell, so I don’t need to switch between applications during my work session. Besides that, an editor should be fast. Contemporary editors should offer an instant experience opening and changing files. If you want to go down the rabbit whole, you can also start configuring your editor to your needs. My opinionated editor recommendations are:
Emacs
My favorite editor. I use it for almost everything: programming, note taking, visual git user interface, writing etc. It’s extremely configurable via Emacs Lisp. Sophisticated, stable plugins exist for every conceivable scenario, for example LSP support, Tree-sitter, Git etc. I run the awesome Emacs Prelude distribution. It builds the foundation for my own modifications.
Neovim
If you don’t like Emacs, Neovim is an alternative on eye level. As a member of the VIM family, Neovim provides the classic modal-editing experience. Neovim is also highly configurable via Lua. You can extend the editor via plugins, write your own config or just use a pre-configured distribution like AstroNvim which gives you an IDE-like feeling without much tinkering.
Helix
Helix is a blazing fast terminal editor written in Rust. Syntax-Highlighting and LSP support works out-of-the-box. I use it for short edits and Rust development. The great thing about Helix is that you get 80% of the Emacs or Neovim features with almost no customization effort.
A normal Emacs or Neovim config consists of thousand lines of code. In contrast, this is my complete helix configuration:
| |
GNU Stow
Although we are done with the shell configuration, we have now a lot of dotfiles
lying around in the $HOME directory. A good way to manage them would be git.
Unluckily, we cannot put our $HOME directory in a git repository. Here
GNU Stow comes into play. GNU Stow uses
symbolic links to manage a group of dotfiles inside a single folder. This is
exactly what we want. Let’s go through a simple example:
| |
If you want to learn how to symlink whole nested directory structures or just dive deeper, you can look into this great step-by-step guide.
Conclusion
The shell is ultimately customizable - use it to your advantages. It will make you more productive and work will be more enjoyable. Thereby the configuration process is never ending, you can always squeeze out more and optimize your environment. I hope this article gave you some valuable insights and ideas how to improve your productivity. And maybe you open your IDE less often 🙃